Here is my skirt tutorial from my book,
Sew Serendipity, as my guest post for the
Summer of No Pants. You can sign up for a
Sew Serendipity book giveaway
here. I decided to start with the Ruffled Skirt and add a pocket from another variation. I used two prints from Poodle, a great collection from Jennifer Paganelli of Sis Boom for Free Spirit Fabrics. The dot is from Michael Miller. I will take you completely through construction according to the instructions in my book. The embellishments are the added pocket, ruffles, and fabric flower.
You may be thinking,"How can I use this?" Simple! You can apply the ruffle idea between seams on ANY skirt or dress pattern as well as dressing something up with a great fabric flower. You might even get industrious and design your own pocket for a paneled skirt. Think outside the box!
Let's get started! First, cut the pieces from the fabric. Notice that the pocket piece is flipped. I only needed the left side pocket and wanted to fussy cut the fabric. That's why I like tissue...you can see through it to do that sort of thing.
Now that the pieces are cut out, it is time to add the fusible interfacing to the wrong side of the facing pieces and sew them right sides together at the sides. Press the seams to one side and serge the lower edge. Set the facing aside for later!
Next, cut some strips for the ruffles. I made my strips 2" wide. Cut off the selvedges, then fold the strips in half widthwise wrong sides together and press.
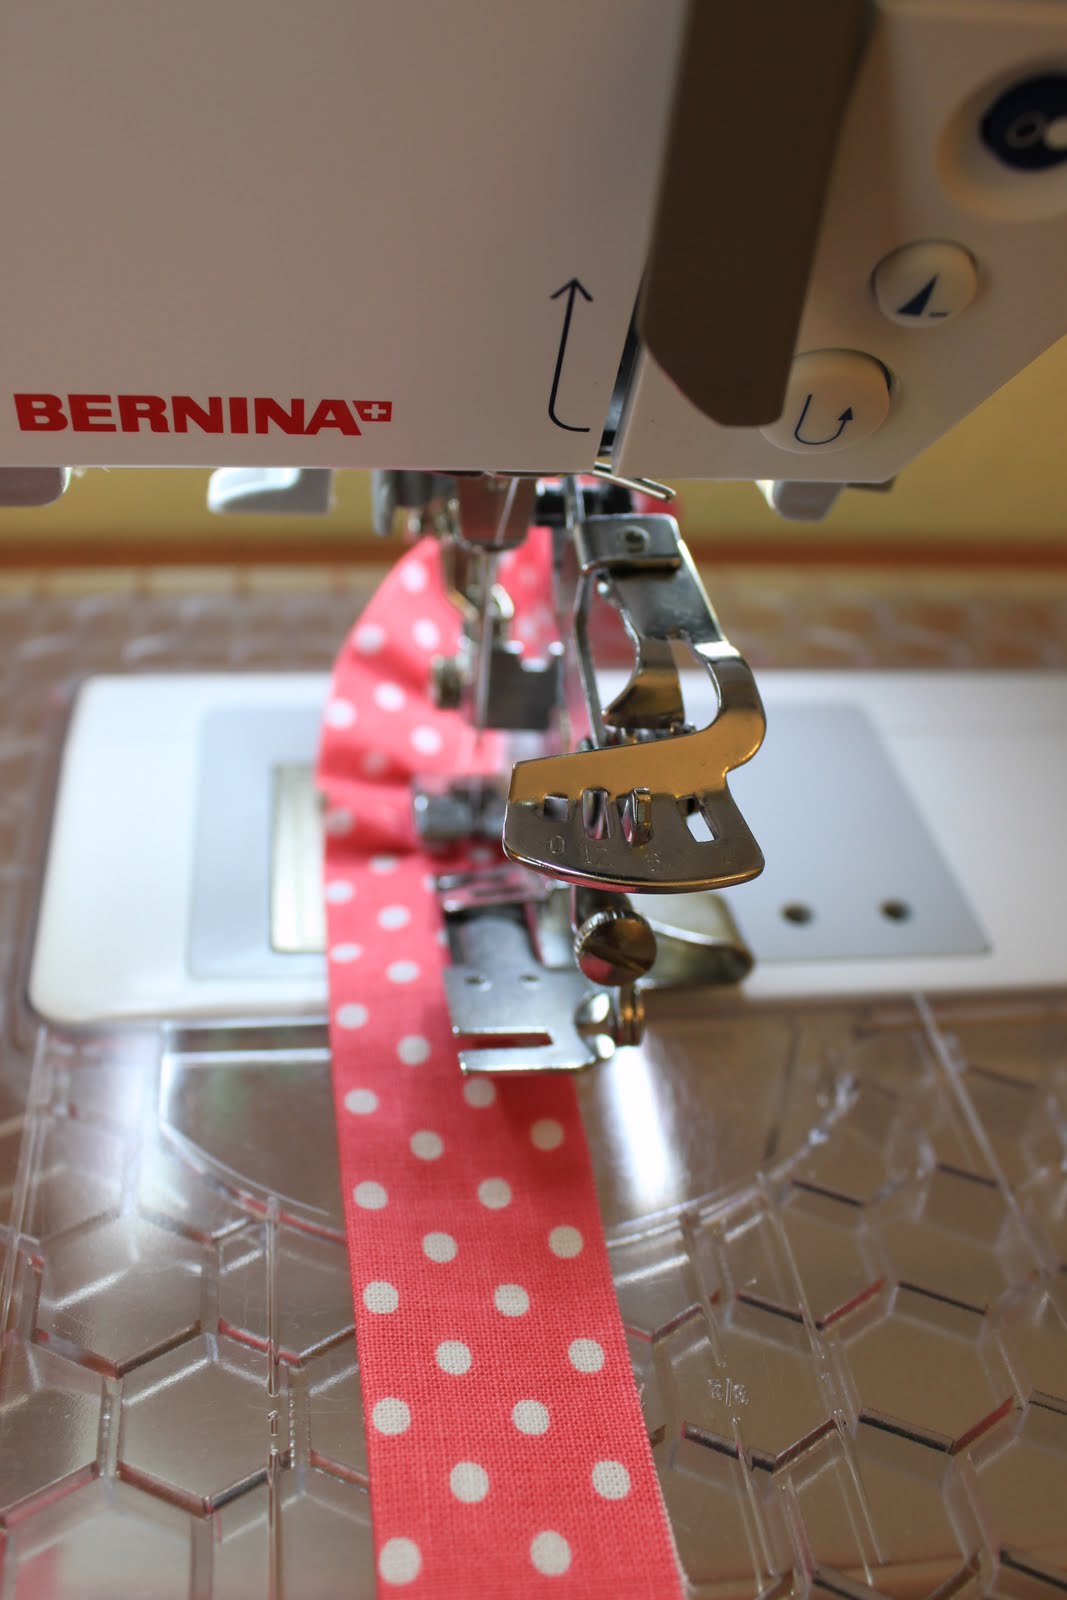
I used my ruffler attachment set at every 6th stitch and gathered up one of the strips. LOVE this foot! It is worth its weight in gold!
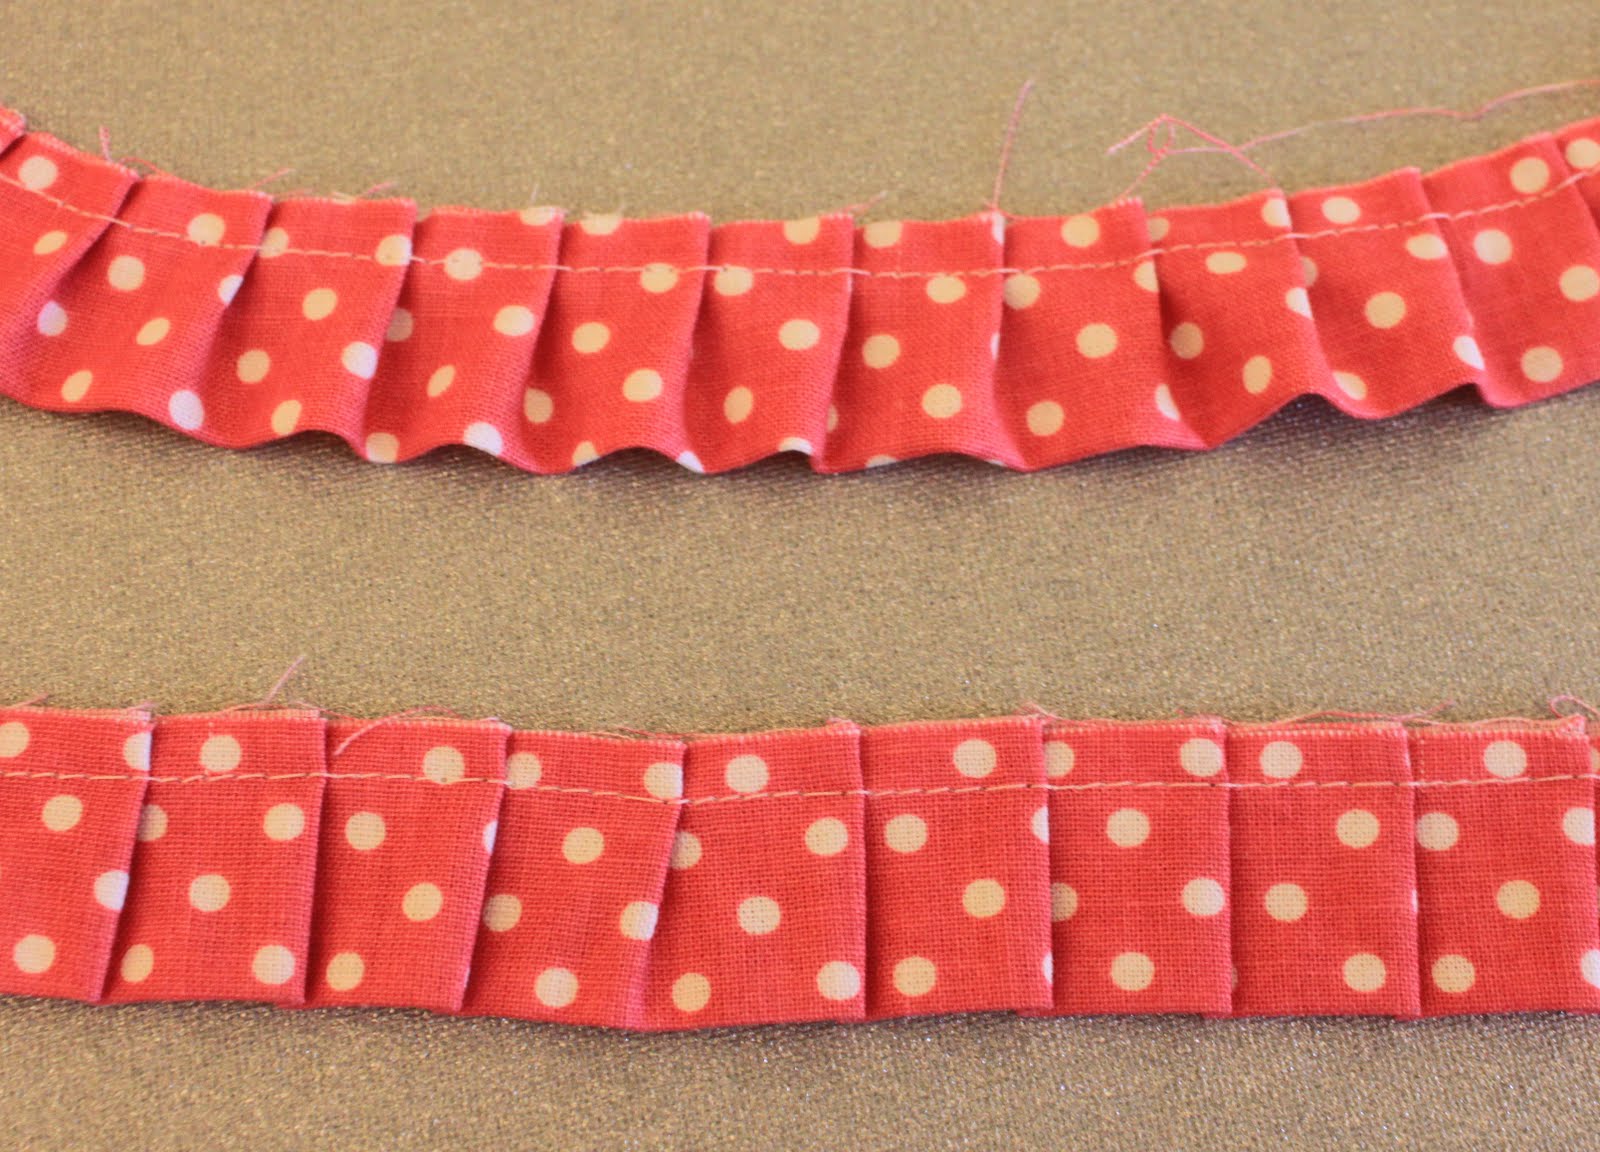
Here, I have shown you the difference between a pressed ruffle and one that isn't....can you guess which is which? This is why I press my ruffles!
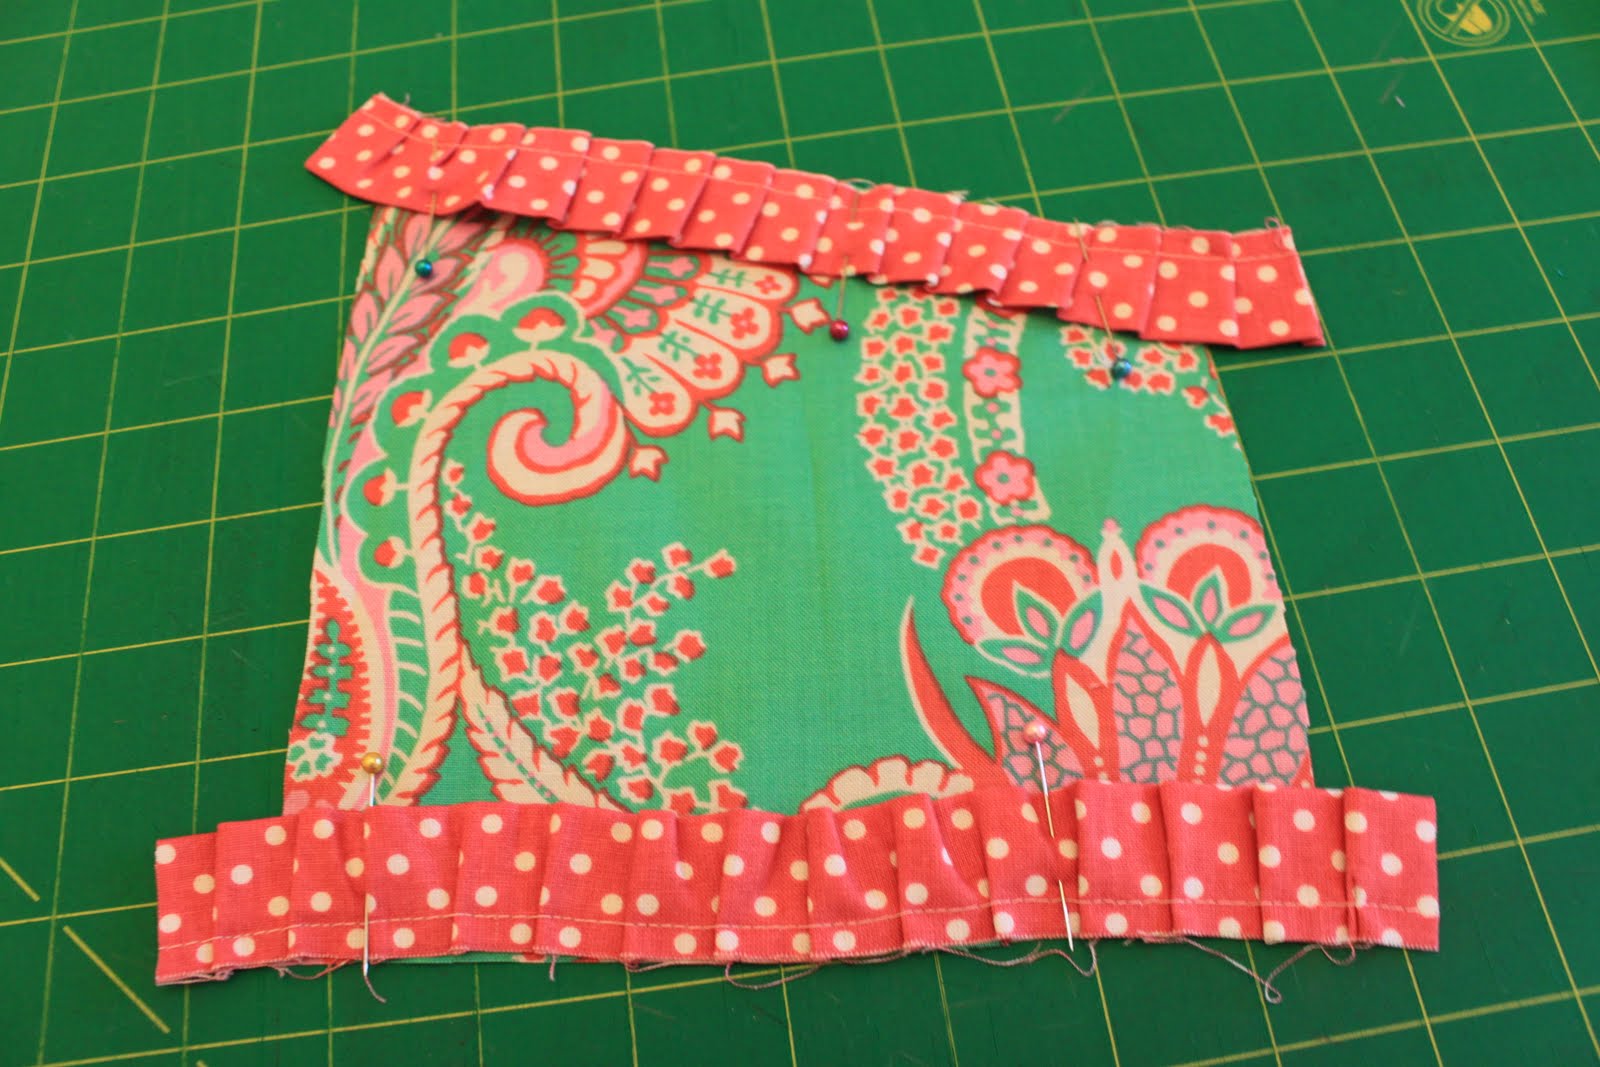
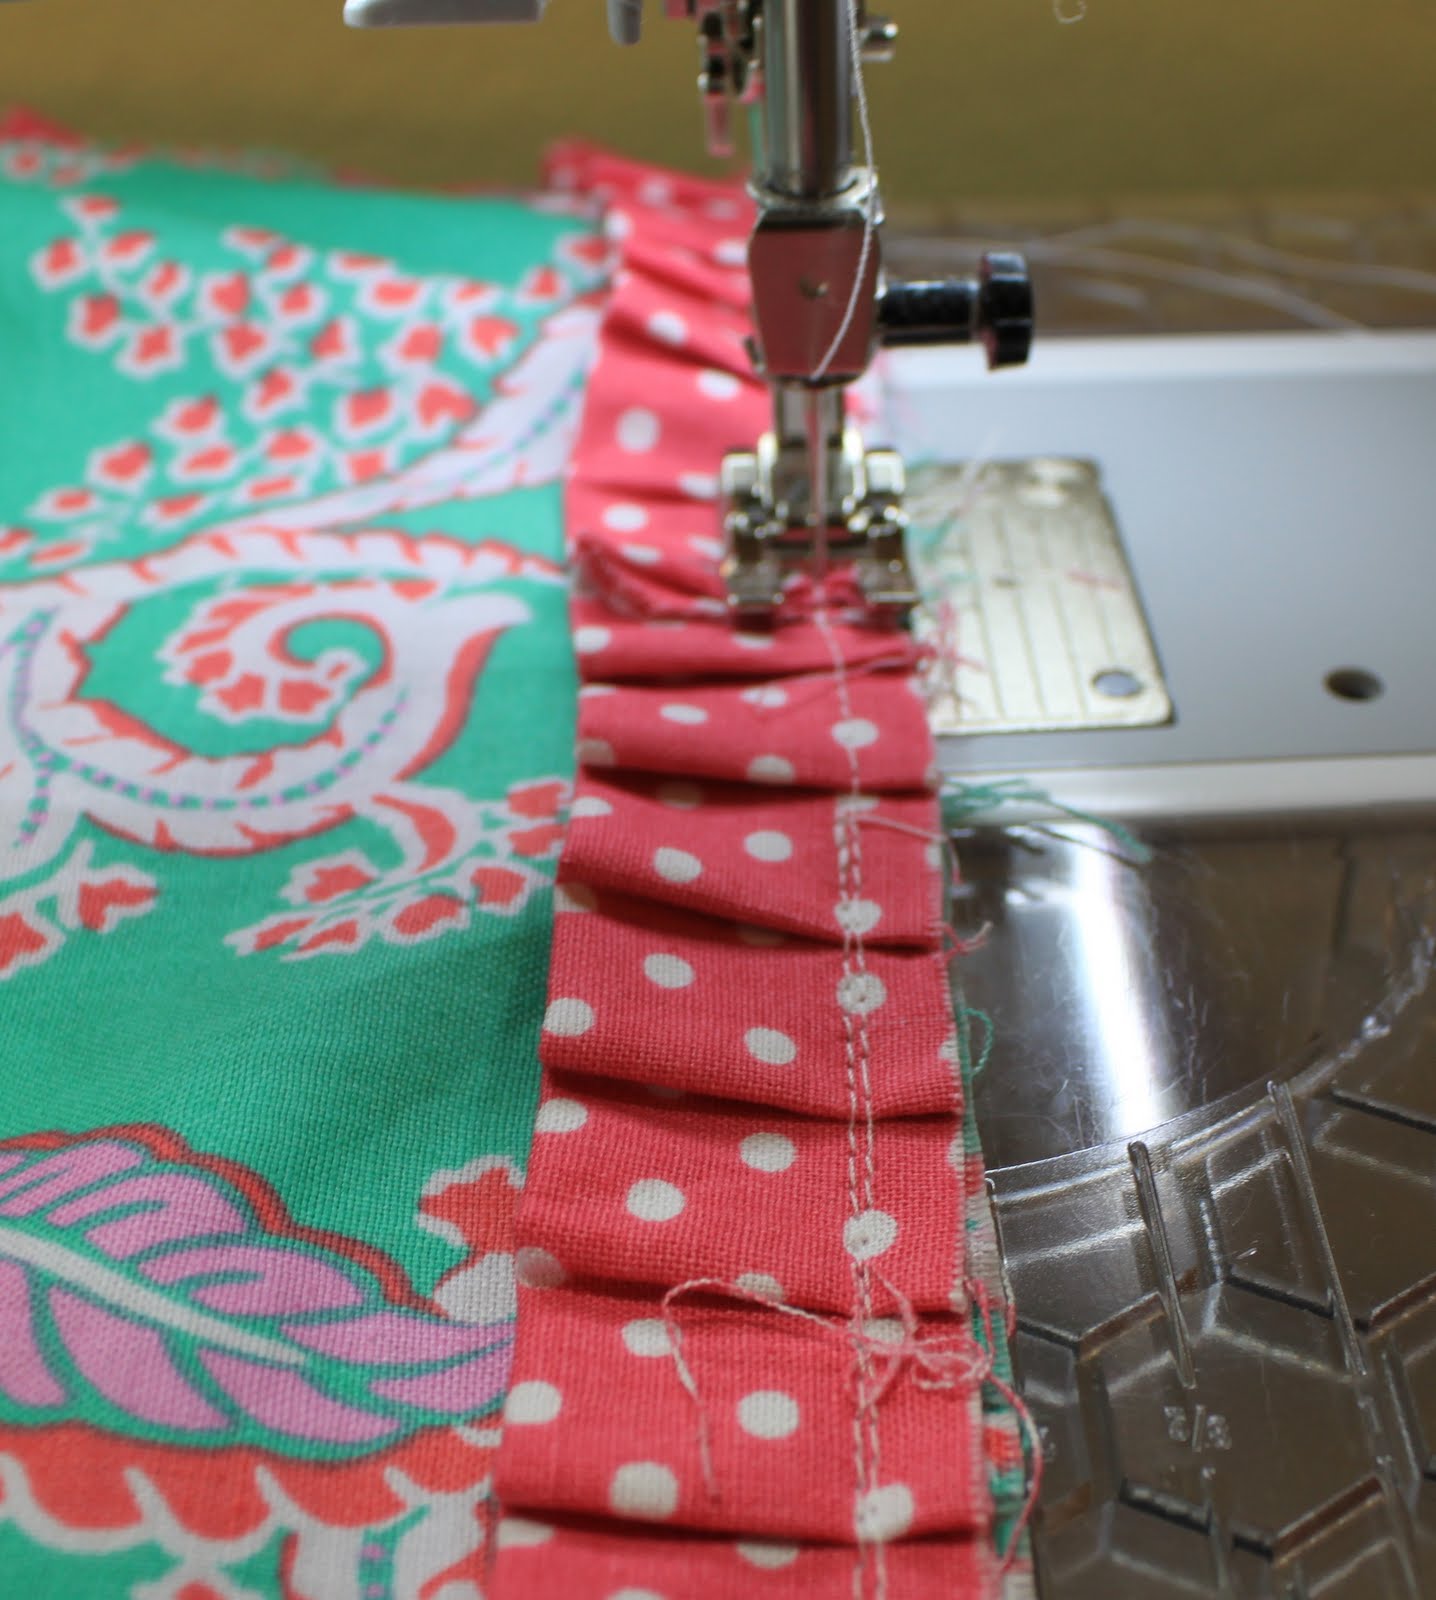
Now it is time to add the ruffles to the upper and lower edges of one of the pocket pieces, against the right side of fabric. I just follow the line of stitching that was created from ruffling the fabric strip.
Add the other pocket piece, right sides together and stitch along the upper and lower edges. Turn the pocket right side out and press, then edge and topstitch the finished edges.
The pocket is added to the left side front piece next. I stitched close to the edge on the sides and on top of previous stitching along the lower edge.
It is time to add the ruffles to the center front and back pieces. Just line up the raw edges with a bit of ruffle extending beyond the upper and lower edges, then stitch in place.
Add the side front and back pieces to the center front/backs. I serge these seams after stitching for a neat appearance. Press the ruffles toward the side pieces, then edge and topstitch the seams. Notice on the center back, the straight edge is serged and ready for the invisible zipper.
I am NOT showing the zipper installation here, but you can visit my "Don't Fear the Invisible Zipper" tutorial on the sidebar. Lots of people have been very successful with their zippers using this method!
Wow....like magic that zipper is in place now! Sew the front and back skirt pieces right sides together along the side seams, then press the seams to one side.
Add the waistline facing to the upper edge of the skirt, right sides together. Notice how the zipper seam allowance has been opened out with the facing. This will be folded in once the stitching is completed.
After stitching, trim down the seam to 1/4" and clip to ease the curve. I always understitch my facing seams. This is done by turning the seam toward the facing and stitching close to the seam line on top of the facing. This prevents the facing from rolling to the outside during wear. Once the understitching is complete, turn the facing to the inside and press.
Open the facing out once more along the center back and fold in the edges of the facing and press, then fold back inside once more.
Edge and topstitch the top finished edge of the skirt, then stitch in the ditch on the side seams to secure the facing. Now it will stay in place during washing and wearing!
Add a ruffle to the lower edge of the skirt, starting at the center back seam against the right side. Notice how I left the first part of the ruffle free. This is so I can join the ends of the ruffle before sewing it to the skirt.
Once most of the ruffle is in place, I stop and fold back the ends of the ruffle and press. Then, open out the ends and mark those creases. Align the creases and stitch together. Trim down the seam and finish attaching the ruffle to the skirt.
Make the lower section of the skirt by placing them right sides together and stitch the side seams. Press seams to one side, then add it right sides together to the lower edge of the skirt on top of the ruffle. Stitch in place.
Press the ruffle down to rest on top of the lower skirt. The seam allowance is pressed upward. Edge and topstitch this seam. Add another ruffle (this one is 4" wide, then folded in half before adding to the skirt) just as the other ruffle was added.
Press and topstitch the seam.
Now for the flower! I cut one 1 1/2" wide strip and folded it in half just like I did for all the other ruffles, ONLY this time, I pressed a small amount at each end to the wrong side for a neat finish. When I gathered it, I set the ruffler for EVERY stitch so it would have a tighter gather. Once gathered, I pressed it flat and began rolling it up.
Once it is rolled up, I used a double threaded needle and hand stitched the layers together. Leave the needle attached once the stitching is complete. See the difference between the flower that has been steamed and the one that hasn't? I like to think that my iron makes these "bloom"!
Use the attached needle and thread and stitch the flower to the lower right seam.
This skirt is ready to wear! I hope you found some inspiration to make this YOUR summer of no pants!
Happy Sewing....